Offering users a personalised and personalisable learning journey provides them a sense of ownership over their personal and professional development environment. This in turn can increase engagement in the learning process and empower individuals to invest time and effort in their ongoing development.
Totara Learn is a customizable LMS that offers a range of personal customisation and personalisation tools to help learners tailor their own learning experience.
We’ve collected together a few ideas on how to use some of this functionality to provide your users with a familiar environment that can support their ever-changing learning and development requirements.
1. Create multiple editable dashboards
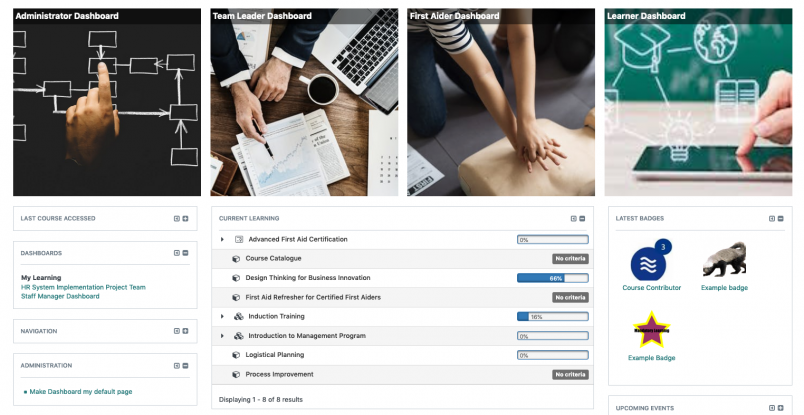
Dashboards provide learners with customisable learning and development portals that act as a centralised, personalised and further personalisable navigation area.
By creating multiple dashboards and assigning them by dynamic audience, administrators can create a variety of spaces that provide assigned users with the navigation, tools and information required for their particular organisation, position, preferred language or system role.
Pro tip: Don’t forget to add the ‘Dashboard’ block to each dashboard so users can quickly move between their assigned pages.
2. Add personalised content blocks to the front page or dashboards
There are a range of blocks available that can display personalised content within the front page, a dashboard or a course page. Consider adding some of these blocks within your site to create pockets of personalisation:
- Current learning
- Last course accessed
- Alerts
- Tasks
- My latest badges
- My learning nav
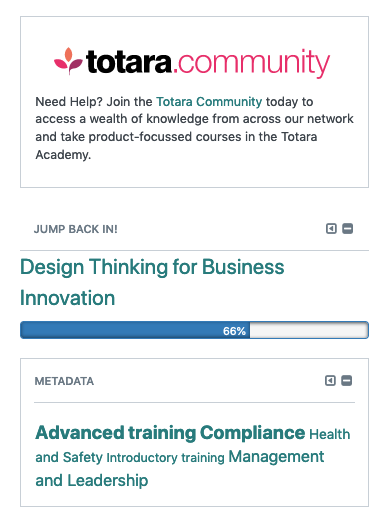
Pro tip: Within Totara Learn 12 you can change the name of a block and remove the heading and/or border around a block. Consider renaming these blocks to something your learners might relate to or find motivational, like changing ‘Last course accessed’ to ‘Jump back in!’
3. Upload multiple themes
Totara Learn can host any number of customised themes across a single site. Themes can be assigned at the category and course level to distinguish different subject areas or departments, or set at the user level.
Individuals can set their preferred theme within their profile, allowing them to choose a colour scheme they prefer, or perhaps choose a more accessible, high contrast version of the standard site theme.
Pro tip: You’ll need to enable user themes via Site administration > Appearance > Themes > Theme settings.
4. Install multiple languages
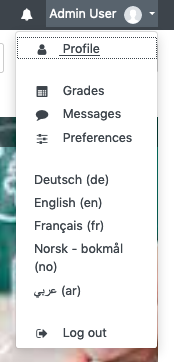
With over 30 language packs available, Totara Learn provides learners a variety of choices on which language they use to view the default navigation, on screen and contextual help, and settings.
Language packs can be installed by a site administrator directly from the administration menu. Once installed, languages will be added as a preferred language option within a user’s profile settings and learners can quickly change their display language via their user menu.
5. Add some custom profile fields
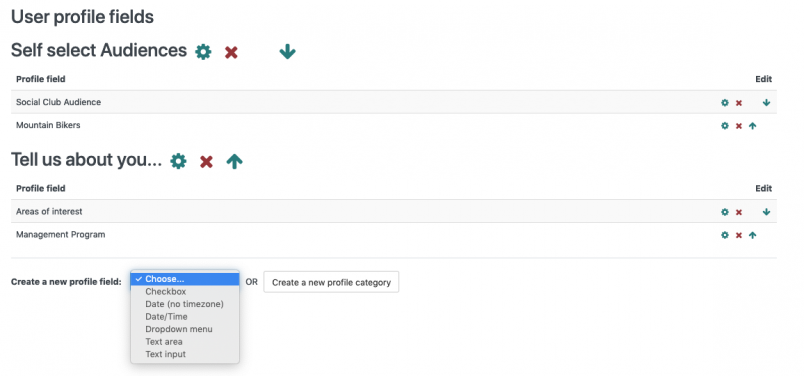
Consider adding some organisation specific custom user profile fields to your Totara site. Not only can individuals share more personal information with their peers to help foster a collaborative and supportive learning environment, you can capture important information about your users that can help personalise their experience further.
Pro tip: You can create a range of different custom user profile fields via Site administration > Users > User profile fields. You can also repurpose some of the standard optional profile fields by renaming them within the language pack. Check out the help documentation on language editing for more information.
6. Encourage users to customise their profile information
As users add more information to their profile area, administrators can create more targeted dynamic audiences – thereby offering greater personalisation via audience-based course visibility, navigation options and dashboards.
Additional profile information also makes it easier for users to find others that share the same interests or hold skills they wish to develop.
Pro tip: One way to encourage users to add additional information to their profile is to award them a system level badge for completing a profile field.
7. Encourage users to add personal goals and objectives
Having a say on your learning and development path and reflecting on your own skills and knowledge gaps is just one more element of personalisation. Enable and encourage users to add their own objectives and goals alongside those assigned by their manager.
So when should you use objectives vs goals?
Objectives (found within learning plans) are designed to capture learning specific objectives – such as ‘Achieve 80% or better in all assessments’ or ‘Complete my onboarding training within one month’.
Personal goals (found under performance) are typically used to capture professional and personal development goals such as ‘Work on my proofreading’ or ‘Send out at least 10 360 feedback requests’.
Pro tip: Make sure learners have permission to add objectives within their learning plans.
8. And speaking of learning plans…
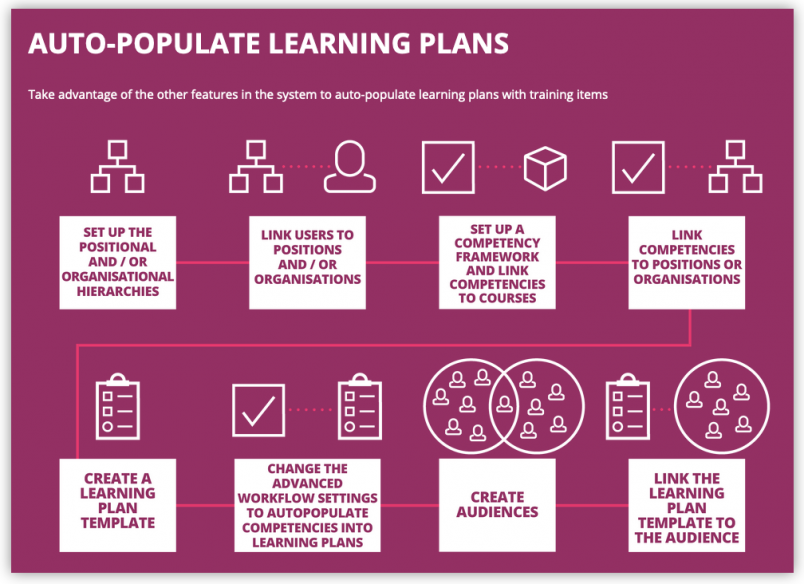
Forget diamonds; automation is an administrator’s best friend. After creating competency frameworks, linking competencies to courses, positions and organisations, and linking users to those positions and organisations, administrators can create learning plans which can be automatically populated with those competencies (and associated courses) specific and relevant to what an individual does and where they do it.
Leveraging HR import and dynamic audiences, a site administrator can automate the upload and update of users to the site and have all their learning plans ready and waiting for learners when they first log in to your Totara site.
Pro tip: The set up for automatically populating learning plans has a few steps, so check out this flowchart from the learning plans course on the Totara Academy.
9. Multiple certificates
Certificates can be automatically awarded to learners for the completion of an activity or course and offer a range of design options such as custom images, borders and personalised text. There is no limit to the number of certificates you can add to a course, so why not make the most of the restrict access functionality and offer personalised certificates for different groups of learners? You might consider using a specific certificate design for learners that achieve a course grade over 90% or perhaps implement a custom design for members of a particular team.
Pro tip: You can upload custom borders, watermarks, seals and signatures via Site administration > Plugins > Activity modules > Certificate > Upload image.
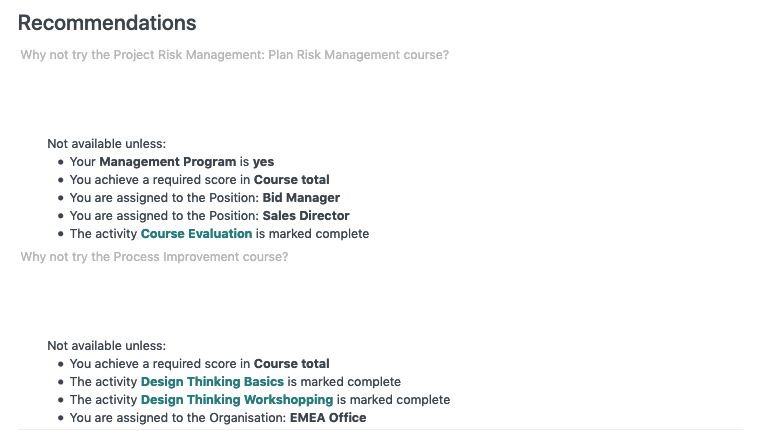
10. Personalised course and activity recommendations
Course managers and administrators can create personalised course and activity
recommendations using the label activity alongside the view/access restrictions.
Recommendations can be based on based on activity completion (or non completion), course or activity grade, audience, some of those custom user profile fields we mentioned above or a combination of them all.
Pro tip: Include a link to the suggested activity or course in your label so the learner can jump straight to it. Remember to allow users access to self-enrol in your suggested courses.
